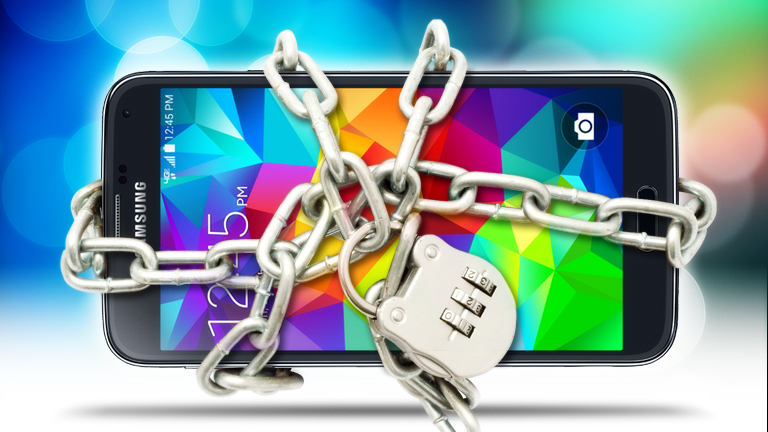
Hey, kids, it’s Dad. For today’s TommyLog I want to talk to you about data. computer data and having a good, solid backup plan. Since I’m running Mac OS X, I use Time Machine to a hands-free, automatic backup, but I also make multiple backups. I use cloud services like google drive, Dropbox and Backblaze. I have external hard drives that I use for backups. I have backups of backups.
Ok, let’s move to everyday life for a moment. Do you have a solid backup plan if things so south? Maybe it’s your evening activities or a vacation.
What’s your backup plan? Always be thinking about plan b!
[Disclaimer: I am a NETGEAR Ambassador and I received this product in exchange for my honest, unbiased opinion and review]
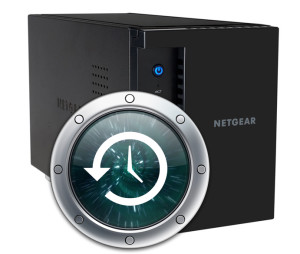
Hey kids, for today’s TommyLog Tech I would like explore being a Mac user with the NETGEAR ReadyNAS 202.
One of the first things that comes to mind when I think external hard drive or NAS and my Mac’s is setting up Time Machine. For those Mac OS X users who don’t know about Time Machine, here’s a short primer. Time machine is an internal OS X software that backs up every piece of your Mac experience. Its job is to remember how your Mac was the last time it was backed up. Time Machine can put that one file or application or, in the case of catastrophic failure, rebuild your entire machine. Every application, webpage, password, cookie and document is restored to its proper place. Time Machines isn’t just a backup, it can restore files “back in time” and saves a history of your work. As long as your Time Machine backup storage place has free space, it will keep revisions of your work. Apple has more info here on the matter. https://support.apple.com/en-us/HT201250
Traditionally getting Time Machine to work wirelessly required either an Apple Airport Time Capsule or Airport Extreme with an attached external USB drive. This is not the case with the NETGEAR ReadyNAS 202. Setting up Time machine on the ReadyNAS could not have been easier! A few quick steps and then it’s pretty much set it and forget it. It just works and work well it did!
Getting Time machine running on the ReadyNAS 202 is totally Tommy Approved!
For more information on how to get your very own The NETGEAR ReadyNAS 202 http://www.netgear.com/home/products/connected-storage/RN202.aspx#tab-techspecs
Hey kids, it’s Tommy and for today’s TommyLog TECH I want to talk about doing a little spring cleaning on your IOS devise. Last night I was watching a movie with my sweetheart on my iPad. A quarter of the way though the movie I got an error message saying that I was out of memory. How could that be? I have a 32 GB IPad Air and I should have plenty of free storage space.
Well enough of this, I’m going to do some spring cleaning here. What I did applies to any late model IOS device, iPad, iPod Touch or iPhone.
First you need to make sure you have a good backup. I use Apple’s iCloud service but you can use iTunes too. Here’s a great article from apple on backing up you iDevice https://support.apple.com/en-us/HT203977
Hey kids, for today’s TommyLog Tech, I need to start with a story. It takes place about 4 years ago…
The place is downtown Chicago. I was there attending a print related convention and it was almost dinner time. I was walking around Michigan Avenue and had just stopped to take a panoramic picture with my brand new iPhone 4 that I had purchased 3 days prior. So imagine this- I had just taken the picture and was sending an email to my oldest kids:
Dear Kids,
I Love Yo…
…and some kid snatched the phone out of my hand and ran. All I could see was the red on the bottoms of his sneakers… and that’s it. A few nice bystanders took off after him, but that was the last time I ever saw my beloved iPhone 4.
So many things run though your mind as you chase after your $600 technology investment, least of which was “oh no–my personal information… when was my last backup?”
Here it is 4 years later, I have a new DROID Turbo by Motorola and I want o give you my top 4 tips to keep your phone and data safe when disaster strikes.
TIP#1 – Screen Lock. Always use the screen lock feature. The DROID Turbo has the ability to set a numerical code, an alphanumeric password, you can set a pattern or you can use your face recognition. I found the facial recognition to be sketchy at best and rarely recognized the face of yours truly. Few things are worse than getting locked out of your own devise.
TIP#2 – Backup. In this day and age there is absolutely zero excuse for not having your data backed up. Cloud storage is plentiful and the process is super easy to implement. Just set it and forget it. Verizon Cloud backup, which I have talked about before, is super easy to set up and with a More Everything plan you get 25GB of storage.
TIP#3 – Remote Lock & Wipe. The new DROID Turbo has deep integration with Android Device Manager, which allows you to access certain functions on the phone from any web browser. During the setup and install of the Turbo, you get asked if you want to enable built in protection functionality. You should answer YES! If you answered NO, simply go to Settings > Security and Screen Lock > Device Administrators and select a devise administrator. This will allow you to remotely lock and wipe your phone from a web browser.
TIP#4 – Insurance. Having all your data backed up is one thing, but not having a phone to put that data on is another. After my iPhone was stolen, and because I was under contact, replacing it cost full retail value– OUCH! Verizon has insurance plans that cover lost, stolen, and even damaged phone. You can get more info from Verizon Wireless here. https://totalmobileprotection.verizonwireless.com/public/all-products
So there you have it, my 4 top tips to protect yourself before disaster strikes. Take it from me, I’ve been there, done that, and I even have a t-shirt. It really rots to have a prized possession loaded with personal data taken from your bare hands, but had I followed all these tips, I promise you, a lot less tears would have been shed.
For more information on how to get your very own DROID TURBO by Motorola, Here’s a link http://www.verizonwireless.com/smartphones/droid-turbo/
Verizon Wireless More Everything Plan http://www.verizonwireless.com/landingpages/more-everything/
DISCLAIMER — I’m one of the cool kids who has been asked to play with and test technology for Verizon. They asked me to test and share my thoughts. All my words are original and my own.
TommyLog TECH – Backing Up with Verizon Cloud #vzwbuzz
Today for TommyLog TECH I want to talk about Verizon’s consumer grade cloud storage solution, appropriately named Verizon Cloud.
Before I dig into that assignment, let me briefly explain what “the cloud” actually means. The cloud is very ambiguous term for server access and storage that lives somewhere (a place few care to visit) and that’s only accessible via the Internet. So your mobile, desktop, and laptops can all access this massive networks of storage and services anywhere you are, worldwide.
Verizon Cloud is just that, a backup and syncing storage solution where your contacts, photos, videos, music, and documents, even your call logs and texts, are stored. The app loads onto your IOS or Android devise, available from Google Play or the iTunes App store. Verizon Cloud also has a desktop version of their app compatible with Windows XP, Vista, Windows 7 & 8 (32 and 64 bit) versions, Mac (OSX 10.5 or greater). Forget your laptop or mobile device and still want to access your stuff? Simply find a computer connected to the internet and log onto verizonwireless.com/cloud and you have access to all your storage.
One great thing about this service is that when you move to a new phone or device, you just download one app, log in with your credentials, and your saved content will begin to be restored based on your download speed of your network. Another feature that I like about Verizon Cloud is that it defaults to only syncing via WIFI as to not use up all your cellular data. This can be overridden if you desire, but be careful, with the 25 GB Verizon Cloud as part of The More Everything Plan, you can max out your monthly data pretty easily.
Verizon cloud apps work fairly seamless with one small exception. The IOS version does not backup automatically. Instead you get a notification which alerts you to initiate a backup. Not good. I’ve been told that the next version of Verizon Cloud for IOS will include automatic background backups. The android version is just “set it and forget it”, backing up in the background based on the time you set. Slick!
I have added Verizon Cloud to my backup and syncing strategy and so should you.
Verizon Cloud if 100% Tommy Approved!
For more information on how to sign up for The More Everything Plan and get 25 GB Verizon Cloud storage for yourself.
[DISCLAIMER — I’m one of the cool kids who has been asked to play with and test technology for Verizon. They asked me test and share my thoughts. All my words are original and my own.]
 Hey kids, it’s Tommy and for today’s TommyLog TECH I want to talk about doing a little spring cleaning on your IOS devise. Last night I was watching a movie with my sweetheart on my iPad. A quarter of the way though the movie I got an error message saying that I was out of memory. How could that be? I have a 32 GB IPad Air and I should have plenty of free storage space.