[Disclaimer: I am a NETGEAR Ambassador and I received this product in exchange for my honest, unbiased opinion and review]
Hey kids, for today’s TommyLog Tech I want to review the new NETGEAR ReadyNAS 214.
The specs of this bad boy are pretty impressive. You can find all the details in the link below in the show notes.
From setting it up, to the apps, to the ease of use via the web interface, the ReadyNAS 214 has it all. No matter if you are a novice to the network attached storage game or a full-blooded techy, this unit fails to disappoint.
If you haven’t seen my setup video on the ReadyNAS 214, look here – https://youtu.be/h_qZiyRSPq4
Mac Friends setting up time machine on the ReadyNAS series of network attached storage is pretty easy. I did a video on this found here https://www.youtube.com/watch?v=80wJu-ldg0s
The NETGEAR ReadyNAS 214 is totally Tommy Approved!
Question – comments – likes – dislikes – Sound off below. I answer all my own email and comments. Love to hear from you!
For more information on how to get your very own The NETGEAR ReadyNAS 202 http://www.netgear.com/home/products/connected-storage/RN214.aspx
[Disclaimer: I am a NETGEAR Ambassador and I received this product in exchange for my honest, unbiased opinion and review]
Hey kids, for today’s TommyLog Tech I want to show you how easy it is to get up and running with the new NETGEAR ReadyNAS 214.
When I opened the ReadyNAS 214, I said to myself “Tommy – Do you think you can get this running and serving files in less than 10 minutes?” Well I wasn’t sure. Did I have to load firmware, install drives, format, partition, and update drivers? No, no, no, no and DOUBLE NO!
Power, network and Go! It’s really that easy. Take a look for yourself how simple getting the ReadyNAS 214 to share files really is. NETGEAR made it so easy, even my 8-year-old daughter Emma could do it. Honestly.
Getting the ReadyNAS 214 set-up and running in less than 10 minutes is totally Tommy Approved!
Question – comments – likes – dislikes – Sound off below. I answer all my own email and comments. Love to hear from you!
For more information on how to get your very own The NETGEAR ReadyNAS 202 http://www.netgear.com/home/products/connected-storage/RN214.aspx
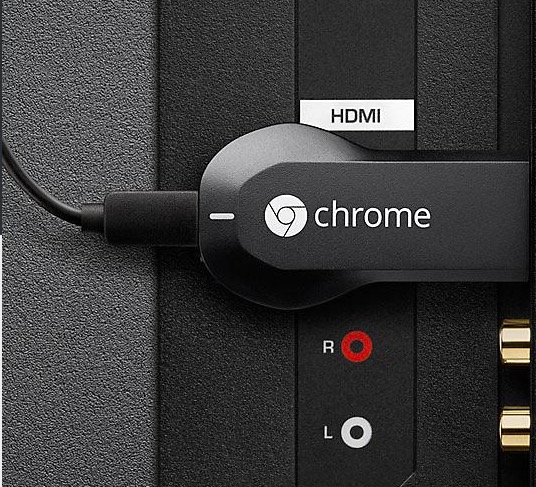
Hey kids, for today’s TommyLog Tech, I want to show you my new Google Chromecast and talk about setting it up and then take a few moments to discuss what makes it different from it’s competitors.
When you open the Chromecast box, the first thing you notice how small the actual unit is. It’s less than 3 inches long but 1.5 inches wide and has a male HDMI on one end and a micro USB port for power on the other. That’s it. The box contains the Chromecast itself, a USD power cables, power adapter to plug into the wall and a HDMI pigtail extended to plug in your Chromecast into tight spots, that’s it. Wait… Where’s the remote? There isn’t one. We’ll get into that a bit later.
Setting up the Chromecast could not be easier. Plug it into a free HDMI port on your HDTV, add the power plug and turn on your TV- making sure to select the proper input. The Chromecast supports both 720P as well as 1080P. The first thing you will notice on your screen is the address of the WIFI network the Chromecast uses to broadcast and it will ask you to connect. Once you connect to the Chromecast WIFI network from your Android, IOS or laptop, you can then finish the 2-minute configuration. Select your home WIFI network and enter your password and you’re done. My Chromecast required an extra 2 minutes of preparation to download new firmware, your mileage may very.
Using the Chromecast is pretty straight forward and intuitive but much different than the Apple TV, Roku or Amazon Fire TV as there is no remote for the Chromecast. The Chromecast supports nearly the same array of channels or apps, as they are called in the Chromecast world, as the competitors. However, Chromecast is not driven by onscreen menus, your device is the remote control. You’ll need to download Chromecast aware apps for your mobile device or laptop. These apps have a Chromecast button on them and actually pass off the stream from your tablet, iPad, phone or laptop directly to the Chromecast. Again, your device acts as the remote. Once the stream starts playing, you can do other things on your device while you enjoy your show. I must admit, I was pretty skeptical of this system but its fast, slick and just rock solid.
Streaming shows from Netflix, YouTube, Hulu Plus, HBOGO and many others to your HDTV with the Google Chromecast is totally Tommy Approved!
For more information on how to get your own Google Chromecast, click here
[DISCLAIMER — I’m one of the cool kids who has been asked to play with and test technology for Verizon. They asked me to test and share my thoughts. All my words are original and my own.]
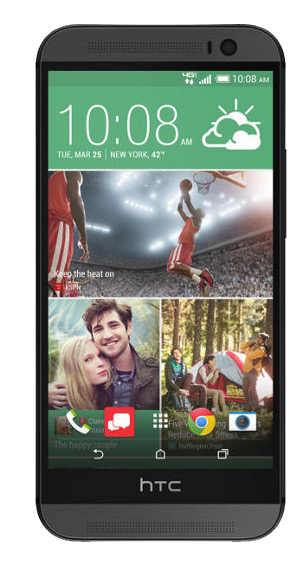
In a previous edition of TommyLog TECH, I raved about the beautiful HTC One (M8) with its curved lines and aluminum goodness. For today’s TommyLog TECH I want to show you how easy it is to set up your new phone. This has to be the simplest setup I have ever encountered in an Android OS phone.
As you well know, I’m a huge IOS fan and have always thought that IOS was the gold standard for ease of setting up devises. Well my solid foundation has shaken a bit after seeing how easy the HTC One is to set up…truly amazing.
Once you open your new phone, you will be asked to login or create a Google account. Next step, you will want to connect to WIFI as there are loads of updates to download. You can download them too over your mobile plan, but be prepared as it will eat up a lot of data. What happens next takes configuring to a whole new level. You will be presented with a website www.start.htc.com and given a code. Go to that site and enter your code. You will then be able to configure your phone from the comfort of your web browser. You pick the phone and the carrier then you pick an interest category like sporting, photography, social media, gaming or others to begin tailor the phone to your liking. From there you are given a host of news and information categories for your BlinkFeed. Next you’ll be given the option of preselecting apps to add to your HTC One. You are now given options to select ringtones and notification tones to give your HTC that personalized feel. and even upload custom ringtones if you have any.
This is such a cool feature! How many people get a new phone, set it up and then say ”Okay, now what?” Well HTC has an answer for that. A few button clicks and bam! The apps you just chose and selected start downloading to your HCT One…just like that its all set up to your liking, background screen, ringtones, bookmarks and all.
HTC has really thought this one through. They made it super simple to setup and customize your HTC One, what a pleasure. Setting up the HTC One (M8) totally 100% Tommy Approved!
For more information on how to get your very own HTC One M8 from Verizon, Here’s a link http://www.verizonwireless.com/b2c/device/smartphone/htc-one?&zipRdr=y
[DISCLAIMER — I’m one of the cool kids who has been asked to play with and test technology for Verizon. They asked me to test and share my thoughts. All my words are original and my own.]